
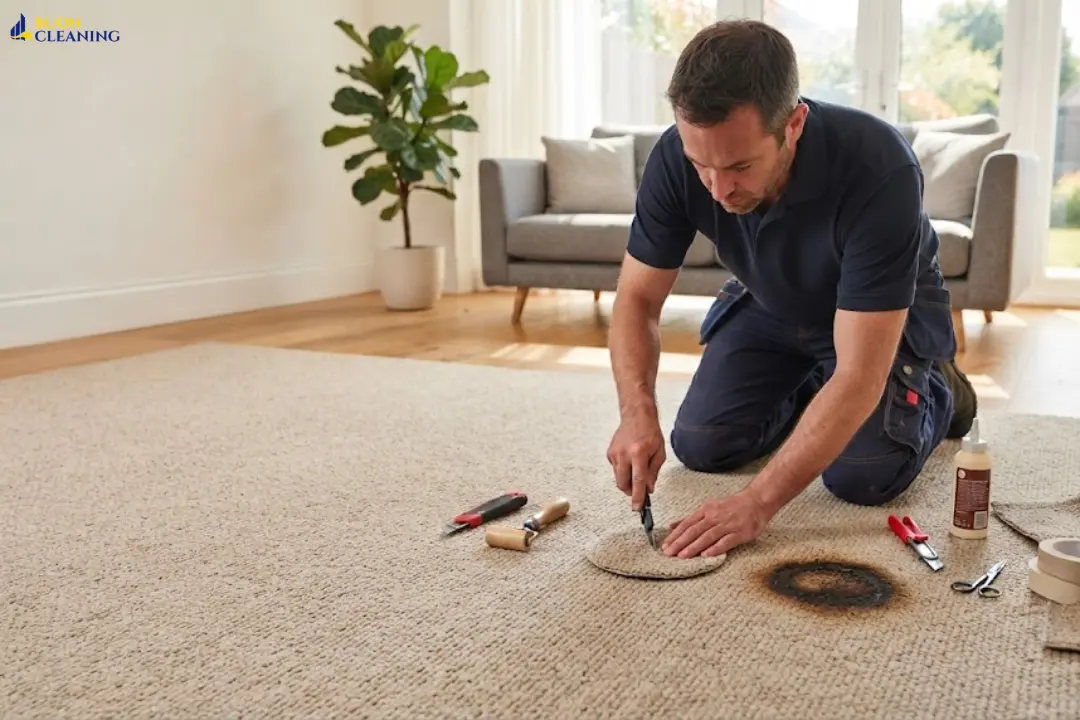
How to Repair a Burnt Carpet (with and without spare carpet)
A dropped iron or stray cigarette ash doesn’t mean you need an expensive new floor. If you want to know how to repair a burnt carpet, the answer comes down to damage depth: minor surface scorches can be fixed by trimming away the blackened fibres and blending the spot with fine sandpaper, while deep or melted burns require cutting out the damaged section and inserting a matching carpet patch.
To achieve a seamless, near-invisible finish, the specialists at Buon Cleaning recommend identifying your specific burn type before picking up any tools. Whether you are harvesting donor fibres from hidden areas behind skirting boards or using leftover installation offcuts, focusing on precision and correct pile direction will save your flooring and eliminate the cost of a full replacement.
Table of Contents
Assessing the Damage
Before grabbing your tools, you must diagnose the severity of the scorch. The exact method for how to repair a burnt carpet depends entirely on whether the heat damage is strictly superficial or structural.
Identify Your Burn Type
Carpet burns fall into two distinct categories:
- Surface Singeing (DIY-Friendly): Only the very tips of the fibres are scorched, discoloured, or lightly melted. Because the underlying carpet backing remains completely undamaged, these are highly reversible with simple blending techniques.
- Deep Burns (Requires Patching): The heat has melted deep into the pile and compromised the backing layer. The damaged area will feel hard, brittle, or hollow, and fibres may be entirely missing, leaving a visible hole or bare patch.
The Texture Test: Gently wiggle the burnt fibres with your finger. If the pile is still flexible beneath the char, it is a surface singe. If the spot feels like a solid, crusty knot, the backing has melted, meaning a simple trim won’t work you will need to patch the section or call a professional.
The “Test” Phase
Before attempting repairs, check if you have spare carpet available. Many UK households retain leftover carpet offcuts from the original installation for future repairs. Look in cupboards, wardrobes, or under radiators where offcuts may have been stored.
If no spare material is available, you can still proceed with fibre-level repairs, but colour and texture matching becomes more important. Even a slight mismatch in pile direction or shade can be visible in natural light.
When to Call a Professional
Some situations are not ideal for DIY repair:
- Large burnt areas (bigger than a coin or small circle)
- High-traffic zones like hallways or stairs
- Patterned or textured carpets that require precise alignment
- Deep burns affecting the underlay or subfloor
- Expensive or delicate wool carpets
In these cases, professional restoration reduces the risk of permanent visible damage and ensures a more consistent finish.
How to Repair a Burnt Carpet Without Spare Carpet
Not every burnt carpet has leftover material available for patching. In many UK homes, repairs need to be done using only the existing carpet. In these cases, how to repair a burnt carpet focuses on reshaping, lifting, or replacing fibres from hidden areas.
Method 1: Trim and Sand Technique (For Light Surface Scorch Marks)
This method works best when the damage is limited to darkened or melted fibre tips.
Start by using sharp embroidery scissors to carefully snip away only the blackened ends. Do not cut too deep, as this can create uneven pile height.
Next, gently smooth the area using fine-grit sandpaper or a nail buffer. This helps blend the remaining fibres and softens harsh edges between damaged and healthy areas.
Finish by vacuuming the area thoroughly to remove loose debris and restore a cleaner surface appearance. This method is most effective for small surface burns where the backing is not affected.
Method 2: Fibre Harvesting (For Tiny Burn Holes)
For very small burns or pin-sized holes, you can reuse fibres from hidden carpet edges.
A common approach is to gather fibres from discreet, less noticeable areas, such as:
- Behind skirting boards
- Under heavy furniture
- Inside built-in wardrobes
Use a small tool like a toothpick or tweezers to apply a tiny amount of latex adhesive or clear fabric glue into the damaged spot. Then carefully “plant” the harvested fibres into the glue so they stand upright.
Press lightly and allow it to dry fully before brushing to blend.
Managing Expectations
These techniques work best for minor damage that is not in a highly visible or high-traffic area. They improve appearance but may not make the repair completely invisible under close inspection or strong lighting.
For larger or more severe burns, replacing the damaged section with a patch is generally the most effective solution.
How to Repair a Burnt Carpet With Spare Carpet
Before attempting any physical fixes, check your home for matching donor material. The exact technique you select for how to repair a burnt carpet depends entirely on whether you have access to matching textiles.
- Leftover Offcuts: Most UK carpet installers leave remnants or offcuts behind. Search airing cupboards, lofts, or spaces beneath wardrobes.
- Hidden Harvest Zones: If you do not have spare offcuts, you can safely source matching fibres from low-visibility areas. Look inside built-in closets, deep behind skirting boards, or under fixed heavy radiators.
If you are forced to work without spare material, your restoration relies strictly on meticulous fibre manipulation. Even minor discrepancies in colour fading or pile direction will show up under direct natural light.
When to Skip DIY and Call a Professional
Not every flooring accident is suitable for a home remedy. Attempting to fix complex damage yourself can transform a minor blemish into a permanent, prominent eye-catcher.
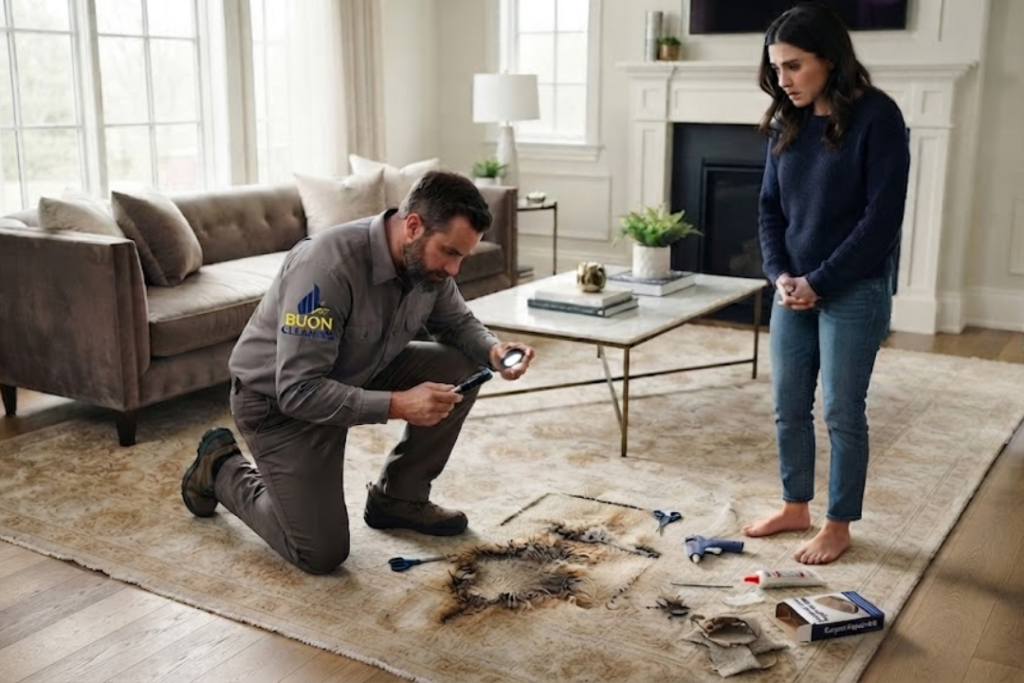
Avoid the DIY approach and contact a specialist like Buon Cleaning if you encounter any of the following scenarios:
- Large Burn Footprints: The damaged area is larger than a standard 50p coin.
- Structural Material Vulnerabilities: The burn involves expensive premium wool blends, patterned motifs, or looped woven styles like Berber carpets (which unravel rapidly when cut incorrectly).
- High-Traffic Zones: The burn is located in plain sight on stairs, landings, or central hallways where seams face continuous foot pressure.
- Deep Subfloor Damage: The burn has melted entirely through the primary pile, the secondary backing, and has scorched the underlying carpet underlay or subfloor.
How to Repair a Burnt Carpet Without Spare Carpet
If you cannot find leftover offcuts, you must adapt your strategy based on the depth of the damage. Minor problems can be solved using structural reshaping techniques rather than full piece replacement.
Method 1: The Trim and Sand Technique (For Light Surface Scorch Marks)
This approach works exceptionally well on surface singeing where the backing layer remains untouched. However, the material composition alters how you should proceed:
Synthetic vs. Wool Fibres: Synthetic materials (like nylon or polypropylene) melt into hard, plastic-like crusts that must be gently abraded. Natural wool chars into brittle ash, which releases much faster.
- Isolate and Snip: Take sharp embroidery scissors and carefully clip away the blackened, crusty fibre tips. Avoid deep cuts to prevent a noticeable dip in the pile height.
- Abrade the Edges: Use fine-grit sandpaper or a clean emery board to gently rub the remaining melted edges. This softens the hard plastic tips and separates fused fibres.
- Vacuum Cleanup: Thoroughly vacuum the spot to extract dislodged debris, then rub the surrounding clean pile with a blunt coin edge to lift and integrate the fibres.
Method 2: The Fibre Harvesting Technique (For Small, Deep Burn Holes)
For small, pinpoint burns from cigarette ash or hot embers that have created a small hole, you can harvest fresh matching pile from hidden areas to rebuild the section.
- Harvest the Donor Fibres: Use a sharp craft knife to carefully shave or clip a small cluster of loose carpet fibres from inside a wardrobe or along the wall edge behind a baseboard.
- Prep the Target Area: Scrape out any crusty debris inside the burn hole using tweezers.
- Apply a Specialized Adhesive: Place a small bead of flexible latex adhesive or clear textile fabric glue into the base of the hole using a toothpick. Never use standard superglue, as it dries into a rigid, white crystal structure that ruins the texture of the pile.
- Plant the Pile: Use your tweezers to firmly press the harvested fibres directly into the adhesive. Ensure they stand perfectly upright, matching the height of the surrounding floor. Allow it to cure completely for 24 hours before brushing gently to blend.
How to Repair a Burnt Carpet With Spare Carpet
For extensive burns that go deep into the backing, the most reliable way to fix a burnt carpet is to perform a full patch replacement. Having matching material allows you to swap out the damaged section for a seamless, structurally sound repair.
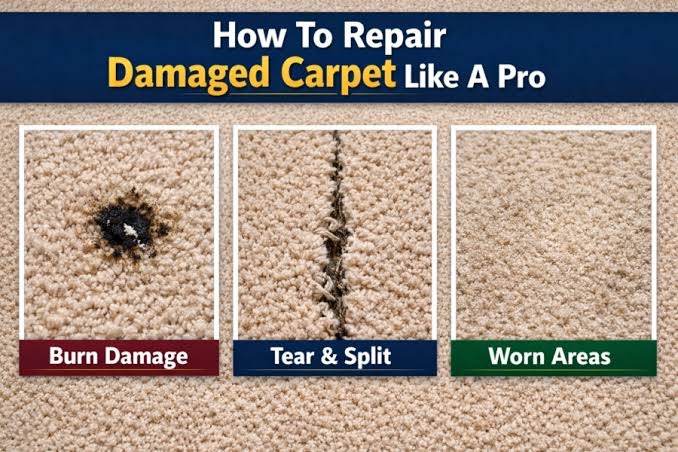
Identifying the exact damage layout dictates whether you need a minor fibre harvest or a full structural patch.
Here are the steps using which you can fix your burnt carpet at home:
Step 1: Gather Your Precision Equipment
Collect a sharp utility knife (fitted with a fresh blade), heavy-duty double-sided carpet tape or professional latex adhesive, a metal ruler, a star roller or carpet seam comb, and a heavy weight (like a large textbook). Ensure the workspace is well-lit for better visibility.
Step 2: Cut the Donor Template
Cut a square or rectangular patch from your spare carpet offcut that is slightly larger than the burnt area. Pay close attention to the nap direction (the angle at which the fibres lean). The nap on your new patch must point in the exact same direction as the installed room flooring.
Step 3: Extract the Damaged Section
Press your donor patch firmly over the burnt area. Using it as an exact cutting template, guide your utility knife around the perimeter. Cut firmly through the carpet backing, but be careful not to score the underlay underneath. Remove the damaged, burnt square.
Step 4: Apply Adhesive Support: Substructure Prep
Clean away any loose threads from the opening. Cut strips of professional double-sided carpet tape and slide them face-up beneath the edges of the cut opening, ensuring half of the tape sits securely under the old carpet frame.
Step 5: Insert and Bond the Patch: Installation Phase
Double-check the pile orientation one last time. Lower the new patch directly into the cut opening, pressing the perimeter firmly down onto the exposed tape edges. Ensure it sits perfectly level with the surrounding floor.
Step 6: Set and Blend the Seams: Final Curing
Place a heavy object over the patch for several hours to secure the bond. Once cured, run a carpet seam roller or a clean comb back and forth across the edges. This interlocks the old and new fibres, completely concealing the cut lines.
Three Essential Rules for an Invisible Finish
- Master the Pile Reflection: Most carpets have a strict directional weave. If you install a patch rotated 180 degrees, it will reflect light differently, making the patch look significantly lighter or darker than the rest of the room. Always verify the natural slant of the pile before making your cuts.
- Use Flexible Glue Only: Avoid rigid household adhesives. Professional carpet repair requires specialized latex glues or commercial carpet tapes that maintain flexibility underfoot, ensuring the repaired section moves naturally when stepped on.
- The Setting Trick: Never skip placing a heavy flat weight on the finished area during curing. Unweighted patches tend to lift slightly at the corners as the adhesive dries, creating minor ridges that catch footwear and cause rapid, uneven wear over time.
The Benefits of Professional Maintenance
While these DIY steps can fix minor household accidents, deep burns or premium materials often need a specialist’s touch.
Specialist technicians, such as the team at Buon Cleaning, use professional tools like star rollers, carpet tractors, and advanced colour-matching systems to deliver flawless structural repairs. Choosing a professional restoration over an impulsive DIY attempt prevents costly installation mistakes, protects your home’s structural value, and saves you from the massive expense of purchasing new carpet.
FAQs
Can all types of burnt carpets be repaired at home?
No. Small surface singes and tiny holes can be resolved with DIY techniques. However, large burns, delicate woven wools, or damage that extends deep into the underlay require professional tools to ensure a safe and lasting fix.
What is the simplest way to fix a burnt carpet?
The easiest method is trimming away charred tips with embroidery scissors and blending the area with an emery board. This approach is highly effective for light surface scorches that haven’t damaged the primary backing.
Can I repair a scorch mark without a matching carpet offcut?
Yes. For tiny holes, you can harvest donor fibres from hidden spots, such as behind baseboards or inside fitted wardrobes, and secure them into the damaged area using flexible latex adhesive.
Where can I source a matching patch if I don’t have leftover offcuts?
If no installation remnants exist, you can cut a clean donor piece out from a hidden corner inside a built-in closet or from underneath a permanently fitted piece of furniture.

Leave a Reply