
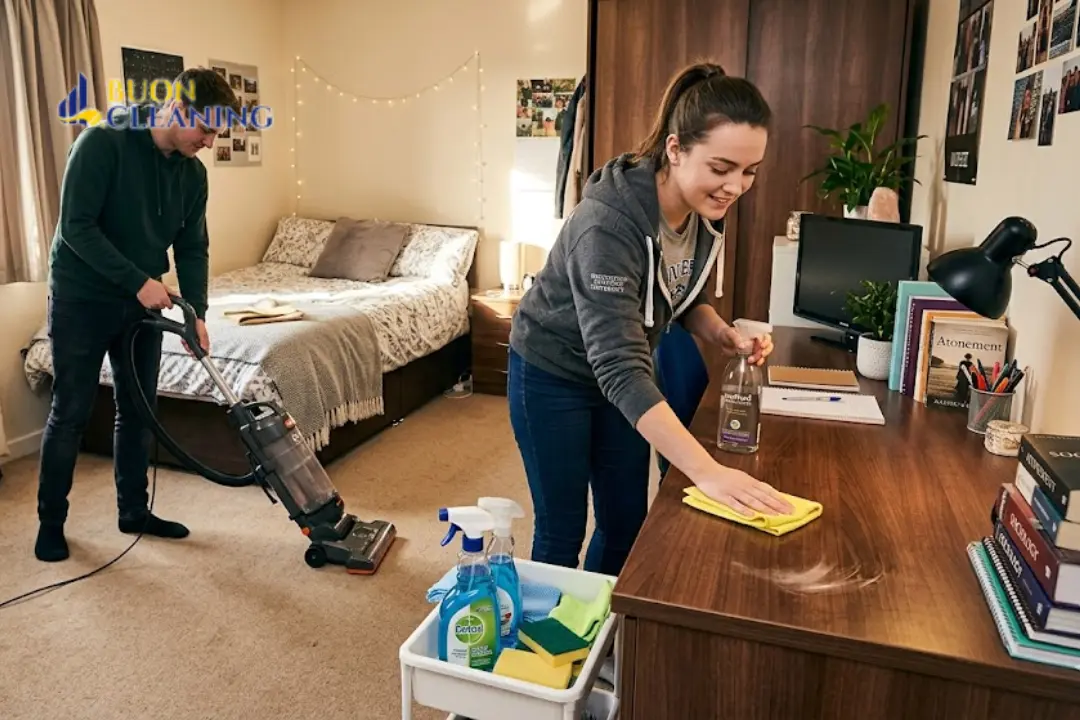
Student Room Deep Cleaning Checklist UK (2026)
How to Deep Clean Your Student Room & Protect Your Deposit
- Document Everything: Take timestamped photos on move-in and move-out days.
- Target Hidden Zones: Landlords always check window tracks, extractor fans, and under the bed.
- Let Products Soak: Apply limescale remover and oven cleaner first; don’t scrub immediately.
- Know Your Rights: Under the Tenant Fees Act 2019, landlords cannot force you to pay for a professional clean.
| Start cleaning two weeks before move-out, not the night before. Follow a room-by-room checklist targeting the 12 areas landlords always check. Take timestamped photos of each room before and after. Keep all communication with your landlord in writing. Under the Tenant Fees Act 2019, you are not legally required to pay for a professional clean; you only need to return the property to the condition recorded in the check-in inventory. |
Table of Contents
Why Deep Cleaning Your Student Room Matters
You can spend three years building good memories in your student accommodation and then lose a significant chunk of your deposit in the final 48 hours, purely because of cleaning.
Cleaning is by far the most common reason for deposit disputes in the UK. According to the Tenancy Deposit Scheme (TDS), cleaning accounts for over 50% of all deposit disputes they adjudicate. For student tenancies specifically, the figure is even higher. Students lose an average of 32% of their deposit to cleaning-related deductions, money that in almost every case could have been kept with a proper checklist and a few hours of work.
The good news? Nearly all of these deductions are avoidable. Landlords and letting agents are not looking for perfection; they are comparing the property against the check-in inventory. If you return the property to the condition it was in when you moved in, you are entitled to your full deposit back.
Common deposit deductions and typical costs:
| Area | Common Issue | Typical Deduction |
| Oven & hob | Baked-on grease, dirty racks | £50–£120 |
| Bathroom | Limescale, mould in grout, dirty toilet | £40–£100 |
| Carpets | Stains, embedded dirt, odours | £60–£200+ |
| Window tracks | Compacted grime and debris | £30–£50 |
| Walls | Blu-Tack marks, scuffs, stains | £20–£80 |
| Fridge/freezer | Mould, food residue, ice build-up | £25–£60 |
| Skirting boards | Dust accumulation, scuff marks | £15–£35 |
| General rubbish | Items left behind, full bins | £30–£80 |
| REGIONAL NOTE These are typical deduction ranges across UK student tenancies. Actual costs vary by location. Deductions in London and the South East tend to fall at the higher end of these ranges. |
When to Deep Clean Your Student Room
There are four distinct cleaning moments in your tenancy, and confusing them leads to either unnecessary stress or missed deposit money.
| Frequency | What to do | Time needed |
| Daily (2 min) | Pick up 5 items, open window, clear desk | 2 minutes |
| Weekly (45 min) | Full surface wipe, vacuum/sweep floor, empty bin, wipe high-touch surfaces | 45 minutes |
| Monthly (2–3 hrs) | Deep clean bathroom, fridge, oven interior, wardrobe, under bed | 2–3 hours |
| End of tenancy | Full room-by-room deep clean against the check-in inventory | 6–12 hours (whole property) |
| PRO TIP Most universities conduct room inspections once per term. Private landlords typically inspect every three to six months. Check your tenancy agreement and clean to the required standard before each inspection — not after you receive a complaint. If you are at the end of your tenancy, start two weeks before your move-out date. |
Cleaning Supplies You Need (and What They Cost)
You do not need a cupboard full of specialist products. The following covers almost everything in a student’s room. Most items are available at Tesco, Sainsbury’s, Poundland, or B&M.
| Product | What it’s for | Approx. cost |
| White vinegar | Limescale, grout, mirrors, windows, mould — the most versatile product you can own | ~£1 per litre |
| Baking soda | Odour removal from mattresses, carpets and bins. Also, a gentle scrub for sinks and baths | ~£0.75 per 200g |
| Antibacterial spray | Surfaces, door handles, light switches, desk and kitchen worktops | ~£1.50–£3 |
| Limescale remover | Taps, showerheads, and toilet bowls. Essential in hard water areas (most of England) | ~£2–£4 |
| Oven cleaner spray | Baked-on grease inside the oven, on racks, and on the grill. Essential for the end of tenancy | ~£3–£5 |
| Microfibre cloths | Everything. Far more effective than paper towels and reusable. Keep at least four | ~£2–£4 (pack) |
| Toilet bleach | Toilet bowl, drain cleaning, mould on grout and sealant | ~£1–£2 |
| Melamine foam pads | Scuff marks and Blu-Tack residue on walls (magic erasers) | ~£2–£4 (pack) |
| Mould & mildew spray | Bathroom grout, window frames, sealant around bath or shower | ~£3–£5 |
| Enzyme cleaner | Biological matter on upholstered furniture. Standard cleaners do not work on these | ~£8 (Nature’s Miracle) |
| Old toothbrush | Grout lines, tap bases, overflow slots, and window track corners | Free (reuse) |
| Vacuum cleaner | Floors, mattress, under bed, upholstery. Borrow from accommodation if needed | Available from halls |
| BUDGET NOTE A full cleaning kit costs £15–£25 if you buy everything new. Split the cost with housemates. Poundland stocks most of these basics and the quality is perfectly adequate for end-of-tenancy cleaning. |
The 12 Hidden Zones Landlords Always Inspect
These are the areas most students miss, and landlords always check. They are not obscure — they are simply overlooked because they are not in your direct eyeline when you walk into a room. Every single one below is a known deposit deduction trigger.
| ZONE 01 Window Tracks Vacuum with a nozzle attachment, then use a cotton bud with white vinegar in the corners. Wipe dry. Takes 15 minutes per window — the single most commonly missed area. Typical deduction if missed: £30–£50 | ZONE 02 Wardrobe & Drawer Interiors Empty completely, vacuum the floor inside, wipe all shelves and interior walls with a damp cloth. Corners are a particular inspection point. Typical deduction if missed: £20–£40 |
| ZONE 03 Skirting Board Tops The top surface collects a thick layer of dust that tells inspectors exactly how well you cleaned. Run a damp microfibre cloth along every skirting board. Typical deduction if missed: £15–£30 | ZONE 04 Under the Bed Pull the bed fully away from the wall. Vacuum thoroughly. Wipe any marks on the skirting board behind it. Replace in original position. Typical deduction if missed: £20–£40 |
| ZONE 05 Extractor Fan Grilles In both bathroom and kitchen. Gently vacuum the grille and wipe the surrounding frame. Blocked fans contribute directly to mould. Typical deduction if missed: £15–£25 | ZONE 06 Light Fittings & Ceiling Remove diffuser covers, wipe the inside, check for dead insects and replace. Remove cobwebs from all corners. Dust the tops of pendant shades. Typical deduction if missed: £10–£20 |
| ZONE 07 Shower Drain & Overflow Slots Clear hair from the shower drain. Clean overflow slots on sink and bath with a cotton bud and diluted bleach — removes biofilm that causes persistent smells. Typical deduction if missed: £20–£35 | ZONE 08 Fridge Door Seal The rubber seal is a mould hotspot. Wipe thoroughly with diluted bleach using a cotton bud. Also check microwave seals. Typical deduction if missed: £15–£30 |
| ZONE 09 Behind Appliances Pull out the fridge and microwave. Clean behind each one. Grease and dust accumulate in these spaces over a full tenancy. Typical deduction if missed: £20–£40 | ZONE 10 Door Frames & Tops The top of every door frame accumulates a visible layer of dust. Wipe with a slightly damp cloth. Check frame edges for scuff marks. Typical deduction if missed: £10–£20 |
| ZONE 11 Toilet Base & Back Panel Clean behind and around the base of the toilet, not just the bowl and seat. Inspectors often check the back panel and floor at the base specifically. Typical deduction if missed: £15–£25 | ZONE 12 Blu-Tack Wall Marks Rub fresh Blu-Tack over residue to lift it. For stubborn marks use a melamine foam pad or small amount of white spirit. Check every wall carefully. Typical deduction if missed: £20–£80 |
Student Bedroom Deep Clean Checklist
Always clean from top to bottom — start at the ceiling and work down to the floor, so dust and debris fall onto surfaces you have not yet cleaned. This one rule saves you from doing any area twice.
| BEFORE YOU START Take timestamped photos of the room from the same angles as your move-in photos. Do this before cleaning (documenting the current state) and again after (documenting the standard you achieved). These photos are your legal protection against unfair deductions. |
Bedroom — Full Deep Clean
~90 minutes | £0–£5 in products | 17 tasks
CEILING & HIGH AREAS — START HERE
- Remove cobwebs from all corners — Use a damp cloth on a long-handled mop or stretch with a dry cloth. Check where walls meet the ceiling all the way round.
- Wipe ceiling vents and any air grilles — Vacuum gently first, then wipe the frame with a damp cloth. Clogged vents are a noted inspection point.
- Clean light fittings and lampshades — Remove diffuser covers where possible, wipe inside, check for dead insects. Dust pendant shades or standing lamps.
- Dust tops of wardrobes, shelves, and door frames — A thick dust line on top of furniture indicates the room was not maintained. Wipe with a slightly damp microfibre cloth.
WALLS & MID-LEVEL SURFACES
- Remove all Blu-Tack and check for residue — Rub fresh Blu-Tack over residue to lift it. Use a melamine foam pad for stubborn marks. Check behind where the furniture was.
- Wipe scuff marks from walls — A melamine foam pad removes most scuffs. Test on a small hidden area first, especially on matt-painted walls.
- Clean light switches and door handles (both sides) — Wipe with an antibacterial wipe. Visibly dirty switches make a poor impression on inspectors.
- Wipe picture frames, mirror surfaces and wall-mounted items — Clean glass with glass cleaner on a microfibre cloth to avoid streaks.
REMOVE STICKY VAPE RESIDUE
If you or your housemates vape indoors, propylene glycol leaves a sticky film on the walls that attracts heavy dust. Use a foaming bathroom cleaner (like Flash) in a well-ventilated room to break down the yellow residue, then wipe it away with a damp cloth.
SAFELY REMOVE LED LIGHT STRIPS
Do not rip LED strips off the wall, or you will pull the latex paint right off the drywall. Use a hair dryer on medium heat to soften the adhesive, then slide dental floss behind the strip to slice it off cleanly.
WARDROBE & STORAGE
- Empty the wardrobe completely — Remove every item. Check corners for anything left behind. Landlords charge for the disposal of abandoned belongings.
- Wipe wardrobe interior — floor, shelves and walls — Use a slightly damp cloth. Pay particular attention to corners where dust and debris collect.
- Check for mould in wardrobe corners — If present, spray with 50/50 white vinegar and water and wipe. Widespread persistent mould is often the landlord’s responsibility — report it in writing.
- Empty and wipe all drawers inside and out — Remove contents, vacuum inside, wipe with a damp cloth. Clean exterior drawer faces as well.
BED, MATTRESS & DESK
- Strip and wash all bedding at 60°C — Sheets, pillowcases, duvet covers. A 60°C wash kills dust mites.
- Vacuum the mattress using an upholstery attachment — Sprinkle baking soda, leave for 30 minutes, then vacuum off. This neutralises odours. Wipe the bed frame and headboard.
- Clean under the bed thoroughly — Pull the bed away from the wall. Vacuum the floor, wipe any skirting board marks. One of the first places inspectors check.
- Clear and wipe the desk and bedside table — Remove all items, wipe the entire surface. Clean any desk drawers inside and out.
FLOOR & WINDOWS — FINISH HERE
- Clean window glass, frame, sill and tracks — Glass cleaner for the pane. Wipe the sill and frame. Then vacuum the window tracks and use a cotton bud with white vinegar in the corners.
- Vacuum or sweep the entire floor, including corners — Move all furniture to reach the full floor area. Vacuum in two directions on the carpet. Vacuum then mop hard floors.
Wipe skirting boards along their entire top surface — Run a damp cloth along every skirting board. Dust accumulation here directly indicates how well the room was maintained.
Student Bathroom Deep Clean Checklist
The bathroom is typically the hardest room to deep clean and generates the most deposit deductions after the kitchen. Limescale, mould and soap scum build up quickly — particularly in hard water areas like London, the South East, and the East Midlands.
The key technique is to let your cleaning products do the work. Apply limescale remover and bleach first, give them time to soak, then scrub. This saves significant effort and produces far better results.
| APPLY THESE FIRST — BEFORE DOING ANYTHING ELSE Apply limescale remover to taps, showerhead and toilet bowl before you do anything else. Leave to soak for at least 30 minutes while you clean other areas. This is what separates a quick clean from a proper deep clean. |
Bathroom — Full Deep Clean
~75 minutes | £0–£8 in products | 18 tasks
APPLY & LEAVE TO SOAK — DO THIS FIRST
- Apply limescale remover to taps and showerhead — Soak a cloth in white vinegar or Viakal and wrap around taps and showerhead. Leave for 30–60 minutes.
- Apply bleach or limescale remover to the toilet bowl — Squirt under the rim and around the bowl. Leave for at least 20 minutes. Use Viakal or HG for heavy limescale — not just bleach.
- Spray white vinegar on grout lines — Apply to all tiled surfaces, leave for 15 minutes. Loosens soap scum and early mould without harsh chemicals.
WHILE SOAKING: CLEAN EVERYTHING ELSE
- Clean the extractor fan grille — Vacuum gently, then wipe the frame and surrounding ceiling area. A blocked extractor fan directly causes mould.
- Clean the mirror — Spray with glass cleaner or a few drops of dish soap in water. Wipe with a dry microfibre cloth in circular motions. A newspaper also works for a streak-free finish.
- Wipe light fittings and switch plates — Antibacterial wipe on the light switch. Remove any diffuser covers, wipe inside and replace.
- Clean sink basin and taps — By now, soaking will have loosened limescale. Scrub with a cloth, use a toothbrush around the tap base and rinse. Wipe dry to prevent water spots.
- Clean the overflow slot — Cotton bud dipped in diluted bleach into the overflow slot — removes biofilm that causes persistent drain smells.
- Wipe door, frame and handle (including the back of the door) — The back of the bathroom door is often forgotten. Wipe the full surface, frame edges and handle.
RETURN TO SOAKED AREAS
- Scrub the toilet bowl and clean the full exterior — Scrub inside with a toilet brush and flush. Clean exterior, including the back of the base and floor around the toilet base. Wipe seat, lid and cistern.
- Scrub shower or bath tiles and grout — Use a stiff brush on grout lines. For black mould in grout, apply a dedicated mould remover spray, scrub, and rinse. Bleach gel on silicone sealant is most effective for mould.
- Clean the shower tray or bath — Scrub the surface, paying attention to the drain area and any discolouration. Rinse and dry to prevent water spotting.
- Clear the shower drain — Remove and clean the drain cover. Clear hair and debris. Pour boiling water down to flush. A slow drain is flagged in most inspections.
- Descale the showerhead — After soaking, scrub with an old toothbrush. For removable heads, scrub inside the nozzle holes.
FINAL TOUCHES
- Wipe window, sill and tracks — Clean glass and wipe the sill — prone to mould in humid bathrooms. Clean window tracks as per the bedroom checklist.
- Mop or wipe the floor — Clean behind the toilet and in all corners. A clean floor is often the last thing inspectors look at — and they always look.
- Empty, clean and remove the bin — Spray inside with antibacterial spray, wipe dry, remove the bin liner and take the bin out.
Open the window and leave to air — Leave it open for at least 30 minutes after cleaning to clear moisture and chemical smells.
| UK HARD WATER NOTE Most of England — particularly London, the South East, East Anglia and the Midlands — has hard water, causing rapid limescale build-up on taps, showerheads and toilet bowls. A standard bathroom cleaner is not strong enough to remove established limescale. Use Viakal, HG Scale Away, or white vinegar with proper soaking time. |
Student Kitchen Deep Clean Checklist
The kitchen generates more deposit deductions than any other room. Ovens are inspected in detail — a letting agent can legitimately charge £80–£150 for professional oven cleaning if yours is returned with baked-on grease. And they will.
Clean in this order every time: appliances first (longest soak times), then surfaces and cupboards, then the sink, and finally the floor.
Kitchen — Full Deep Clean
~120 minutes | £5–£15 in products | 21 tasks
START THESE FIRST — LONG SOAK REQUIRED
- Spray oven interior with oven cleaner and leave to soak — Remove oven shelves and racks first. Spray all interior surfaces and the door glass with oven cleaner. Leave 20–60 minutes as per the product instructions. Soak racks separately in hot water with biological washing powder.
- Defrost the freezer (if applicable) — Turn off, remove all items, and place towels around the base. Significant ice build-up alone can take 30–60 minutes.
WHILE THE OVEN SOAKS: CLEAN EVERYTHING ELSE
- Clean the hob and burner grates — Remove grates or hotplate covers and soak in hot soapy water. Wipe the hob surface thoroughly, removing all grease around each burner.
- Clean the extractor hood and filter — Wipe the exterior. Remove the metal mesh filter and wash in hot soapy water or the dishwasher. Grease-clogged filters are a standard inspection finding.
- Clean the microwave inside and out — Bowl of water with a tablespoon of white vinegar, run for 3 minutes. Steam loosens residue. Wipe all interior surfaces. Clean the door seal with a cotton bud.
- Empty and clean the fridge thoroughly — Remove all food. Wash shelves and drawers separately. Wipe interior walls with bicarbonate of soda solution (removes odours). Wipe the door seal with diluted bleach.
- Wipe all cupboard exteriors — Door faces, handles and tops of cabinets. Grease from cooking builds up on cupboard doors near the hob.
- Empty and wipe all cupboard interiors — Remove everything, vacuum crumbs, wipe shelves. Do not leave food behind unless you have agreed with your landlord.
- Wipe all worktops and wall tiles — Clear the worktops completely. Clean all surfaces, including areas behind the hob and sink. Wipe and dry tiled areas.
RETURN TO OVEN & COMPLETE APPLIANCES
- Scrub and rinse the oven interior — Using a scouring pad, scrub all interior surfaces. Pay particular attention to the door glass and oven floor, where grease pools. Rinse with a damp cloth and repeat if needed.
- Scrub oven racks and replace — Scrub racks after their soak, rinse and dry completely before replacing.
- Clean the grill pan — soak in hot, soapy water, scrub, and rinse. A dirty grill pan is a standard deduction item.
SINK, FLOOR & FINAL CHECKS
- Descale and scrub the sink and taps — Spray with antibacterial cleaner or diluted white vinegar. Scrub with a cloth, use a toothbrush around the tap base and plug hole. Rinse and wipe dry.
- Clean the overflow slot and plug hole — Cotton bud and diluted bleach in the overflow slot. Clear the plug hole of debris.
- Empty, clean and remove all bins — Clean bins inside and out, wipe the bin storage area. Remove all bin liners before handing back keys.
- Sweep and mop the kitchen floor — Pull out appliances and clean behind them first. Sweep then mop the full floor, including the base of appliances.
- Wipe light switches, door handle and skirting boards — Antibacterial wipe on switches and handle. Damp cloth along all skirting boards.
Final check: open every cupboard and appliance — Walk through and open every cupboard, drawer, oven, fridge and microwave. Confirm each is empty and clean. This is what an inventory clerk does — do it yourself first.
Student Room Deep Cleaning Checklist: Shared Spaces and Communal Areas
In a student house, communal areas are a shared responsibility. In most tenancy agreements, all housemates are jointly and severally liable for the condition of shared spaces — meaning if one person does not clean their share, everyone loses part of their deposit.
Living Room & Hallway Deep Clean
~60 minutes per space | 8 tasks
- Vacuum sofas and upholstered furniture — Use the upholstery attachment. Move cushions and clean underneath and between them. Use an enzyme cleaner for any biological stains on fabric.
- Dust and wipe all hard furniture surfaces — Coffee tables, TV units, bookshelves — wipe every surface and the undersides of glass-topped tables.
- Clean the TV and electronics — Dry microfibre cloth on screens (no spray directly on screens). Wipe remotes and controllers with an antibacterial wipe.
- Clean the windows — Glass, sill, frame and tracks — same process as the bedroom.
- Wipe all radiators — Dust the top and between the fins. A radiator brush or thin cloth gets between fins effectively.
- Clean the hallway, skirting boards and stairs — Sweep or vacuum the full hallway. For carpeted stairs, vacuum each step, including the riser. Wipe the bannister — the lowest section is marked with hand grease from daily use.
- Wipe all doors, door frames and communal handles — Communal door handles are touched by everyone multiple times daily — they accumulate significant grime.
Remove all rubbish and personal items — Check every cupboard and storage area. Landlords charge for the disposal of abandoned belongings.
How to Keep Your Room Clean Throughout the Student Year
End-of-tenancy cleaning is significantly easier when the property has been maintained properly throughout the year. A regularly cleaned room takes two to three hours to deep clean at move-out. A neglected room can take an entire day — and may still result in deductions.
The secret is not effort. It is habit design. Students with clean rooms are not working harder — they have a system that prevents mess building up in the first place.
The 5×5 Rule: 60 Seconds a Day
Every time you walk into your room, pick up exactly five items and put them away. Not ten — five. Dirty clothes to the laundry bag, cups to the kitchen, a book to the shelf, packaging to the bin, one item out of place to its correct spot. Then stop.
If you do this five times a day, you are returning 175 items to their proper place each week without a single dedicated cleaning session. This prevents the psychological burden of a room that looks unmanageable — because it never gets there.
Sunday Reset: 45 Minutes, Once a Week
- Gather (10 min): Take a laundry basket and walk around the room loading it with everything that belongs elsewhere — plates for the kitchen, books for the shelf, clothes for the wash. Do not put anything away yet. Just collect it all in one place.
- Return (20 min): Do one single circuit of the room: kitchen trip with all plates and cups, wardrobe trip with clothes, shelf trip with books and papers. One efficient loop rather than multiple small trips.
- Wipe (10 min): Clear and wipe the desk, bedside table and windowsill. Wipe door handles and light switches with an antibacterial wipe. These high-touch surfaces collect the most visible grime.
- Floor & air (5 min): Quick vacuum or sweep. Empty the bin if full. Open the window for five minutes. Fresh air removes lingering odours and reduces moisture — the main cause of mould in student accommodation.
| ADHD-FRIENDLY NOTE The 5×5 rule works particularly well if you struggle with executive dysfunction — it requires no decision-making and no motivation, just one automatic action every time you walk through the door. For the Sunday reset, a timer works better than willpower: set 45 minutes and stop when it rings regardless. Partial progress every week is significantly better than nothing. |
Crisis Student Room Deep Cleaning: When You’re Overwhelmed or Short on Time
Exam week. Dissertation deadline. A mental health low point. Sometimes the room gets into a genuinely difficult state, and the idea of cleaning it feels paralysing. The goal in this scenario is not a perfect room — it is a room that is safe to sleep in and work in.
20-Minute Triage: In This Exact Order
- Remove all rubbish (5 min): Grab a bin bag and collect every piece of packaging, bottles, tissues and waste. Take the bag straight out to the bin. Do nothing else — no organising, no sorting. Just rubbish removed. This single action transforms the room’s look and feel.
- Gather all laundry into one pile (3 min): Collect all dirty clothing. Put it all into one corner or on your bed. Do not wash it yet. You are creating visible floor space — that is the only goal.
- Remove all dishes (3 min): Take every plate, mug and utensil to the kitchen. You do not have to wash them. Just get food and bacteria out of the bedroom.
- Wipe one surface (5 min): Clear your desk or bedside table — whichever you use most. Wipe it with a slightly damp cloth and leave it clear. When you are overwhelmed, having one clear surface to work or rest at makes a significant difference.
- Open a window (1 min): Leave it open for at least ten minutes. Fresh air improves mood, removes odours and physically changes the atmosphere of the room. Ventilation has a measurable effect on perceived cleanliness.
The DOOM Pile: A Solution That Actually Works
DOOM stands for ‘Didn’t Organise, Only Moved’ — the pile of clutter you keep shifting without actually sorting. Get a large box or laundry basket and put the entire pile into it without sorting. Label it with a specific date (‘SORT BY SUNDAY 2PM’) and move it to a corner. Set a five-minute timer each day and sort only until it rings. Stop when it rings. One five-minute block per day is 35 minutes of progress per week without it ever feeling overwhelming.
| A NOTE ON MENTAL HEALTH A persistently messy room is often a symptom of something else — stress, burnout, depression, or ADHD. If you find it difficult to maintain your space and it is affecting your wellbeing, speak to your university’s student support service. Most UK universities offer free counselling. The room can always be cleaned. Your mental health matters more. |
Roommate Cleaning Conflicts: What Actually Works
Cleaning disputes are the most common source of conflict in student shared housing. The most common failure is the verbal chore chart — everyone agrees in principle, no one follows through, and resentment builds.
Verbal chore charts fail because they have no consequences. Written agreements with specific standards and clear consequences work because they remove ambiguity.
Written Roommate Agreement — Template
SHARED SPACE CLEANING AGREEMENT
Property: _________________________ Date: _____________
Tenants: _____________________________________________________________
1. BATHROOM
Cleaned every Sunday by 6 PM, rotating weekly. Scope: toilet, sink and taps, shower or bath, grout checked for mould, mirror wiped, floor mopped, bin emptied. If not done by Monday 9 AM, the responsible person loses shared bathroom access until complete.
2. KITCHEN
Whoever cooks, cleans immediately. No dishes left overnight. Hob and worktop wiped after each use. Full weekly deep clean on [agreed day]. If dishes are left for more than 24 hours, they are returned unwashed to that person’s room.
3. COMMUNAL AREAS
Hoovered weekly by rotation. Personal items removed from shared spaces promptly. Bins emptied before full.
Signatures:
Name: ________________ Signature: _________________ Date: __________
Name: ________________ Signature: _________________ Date: __________
Name: ________________ Signature: _________________ Date: __________
Common Problems With Student Room Deep Cleaning Practices and Practical Fixes
Hair on the shower floor: Drain catchers (£2 each) solve this completely. Buy one per housemate and make clearing it weekly a personal responsibility.
Dishes left out: The ‘whoever cooks, cleans immediately’ rule needs to be agreed in advance, not reactive. If someone repeatedly violates it, the written agreement’s consequences apply.
Biological matter (vomit, urine) on shared surfaces: This is a health hazard. The person responsible cleans it within 24 hours using an enzyme-based cleaner — not standard spray, which only masks the odour. If they refuse: photograph it immediately, send a group message noting the date and location, clean it yourself with enzyme cleaner, and send an invoice for your time and materials via email.
Student Room Deep Cleaning: Your Deposit Rights Under UK Law
Understanding your legal position is as important as knowing how to clean. Many students accept unfair deductions simply because they do not know their rights.
The Renters’ Rights Act 2026 (New Rules)
The Renters’ Rights Act abolishes fixed-term tenancies in favour of rolling periodic contracts, meaning you can leave at any time with two months’ notice. However, be aware of Ground 4A: landlords can still issue a 4-month notice to repossess a student HMO at the end of the academic year for incoming students. Whenever you move out, your cleaning standard will be judged against the check-in inventory.
The Tenant Fees Act 2019
Since 1 June 2019, landlords in England cannot legally require tenants to use a professional cleaning service as a condition of the tenancy. If your tenancy agreement contains a clause requiring you to pay for professional end-of-tenancy cleaning, that clause is unenforceable. You are required only to return the property to the standard recorded in the check-in inventory, by whatever means you choose.
| SCOTLAND, WALES & NORTHERN IRELAND Similar protections exist across the UK. In Scotland, the Private Housing (Tenancies) (Scotland) Act 2016 applies. In Wales, the Renting Homes (Wales) Act 2016. In Northern Ireland, the Private Tenancies (Northern Ireland) Order 2006. Always check the specific legislation for your region. |
Deposit Protection Schemes
Any landlord who takes a deposit in England or Wales must protect it in one of three government-approved schemes within 30 days: the Tenancy Deposit Scheme (TDS), the Deposit Protection Service (DPS), and MyDeposits. All operate under the Housing Act 2004 and provide a free dispute resolution service. If your landlord fails to protect your deposit within 30 days, you can apply to a county court and claim between one and three times the deposit amount in compensation.
Fair Wear and Tear
Landlords cannot charge for normal deterioration from reasonable use. A carpet walked on for two years will show wear. Paint fades. Walls have small marks. These are not chargeable. What is chargeable is damage beyond normal use — burns, large stains, holes in walls, or a condition significantly worse than recorded in the inventory. If you believe a deduction relates to fair wear and tear, you can dispute it through your deposit scheme.
The Check-In Inventory Is Your Reference Point
Every deduction decision compares the check-out condition against the check-in inventory. If the inventory noted a stain on the carpet when you moved in, and the same stain is there when you leave, that is not chargeable. Read the inventory carefully and keep a copy throughout your tenancy.
How to Dispute an Unfair Deposit Deduction
If you receive a deduction you believe is unfair, you have the right to dispute it. The process is straightforward if you have documentation.
Before You Leave: Your Evidence Pack
Take timestamped photos on move-in day and on move-out day, from the same angles in each room. Photograph every potentially contentious area: window tracks, oven interior, bathroom grout, under beds, inside cupboards and drawers. These photos are the single most effective protection against unfair deductions.
What Your Landlord Must Provide
By law, your landlord must provide an itemised list of deductions — not just a total figure. Each item must have an explanation and supporting evidence such as a photo or professional quote. If they send a total without breakdown, write requesting itemisation before disputing through the scheme.
Deposit Dispute Email Template
📧 DEPOSIT DISPUTE EMAIL TEMPLATESubject: Dispute of Deposit Deduction — [Your Full Name] — [Property Address] Dear [Landlord/Letting Agent Name], Thank you for your deduction notice dated [date], totalling £[amount]. I am writing to formally dispute the following deductions: 1. [Deduction item], claimed cost £[X] . My position: [e.g. “This condition was present at check-in, as shown in move-in photographs dated [date].”] 2. [Second deduction item], claimed cost £[X] . My position: [Your explanation and evidence reference]. I have attached: move-in photographs dated [date] and move-out photographs dated [date]. I request a full itemised breakdown of each deduction, including supporting evidence, within 10 working days. If we cannot reach an agreement, I will raise this as a formal dispute with [TDS/DPS/MyDeposits]. Yours sincerely, [Your Full Name] [Your Address] [Your Contact Number]
| TIME LIMITS Once you receive a deduction notice, respond quickly. Most deposit protection schemes require disputes to be raised within a limited window after the tenancy ends — typically 90 days. Check the specific rules of the scheme holding your deposit. |
Student Room Deep Cleaning Checklist Summary
DURING YOUR TENANCY: Use the 5×5 daily rule and Sunday 45-minute reset. Deep clean the bathroom and kitchen monthly. Report maintenance issues (mould, damp, broken fittings) to your landlord in writing. TWO WEEKS BEFORE MOVE-OUT: Take move-out photos from the same angles as move-in photos. Begin the room-by-room deep clean. Target all 12 hidden zones. ON MOVE-OUT DAY: Do a final walkthrough, opening every cupboard, drawer and appliance. Take timestamped photos of the completed cleaning. Compare against your check-in inventory room by room. IF DEDUCTIONS ARE UNFAIR: Request itemised evidence in writing. Raise a formal dispute with your deposit protection scheme. You have the right to an independent adjudicator at no cost to you.
FAQs
How often should students deep-clean their room?
A light weekly clean (15–20 minutes) is the minimum. A thorough deep clean should happen every four to six weeks during term — covering the bathroom, inside cupboards, under furniture and built-up areas. A full end-of-tenancy deep clean is required before moving out. If you keep on top of the weekly routine, the end-of-tenancy clean takes a fraction of the time
Do students legally have to pay for a professional clean at the end of tenancy in the UK?
No, students do not legally have to pay for a professional clean at the end of a tenancy in the UK, as this is banned under the Tenant Fees Act 2019.
What are the most common causes of deposit deductions for students?
Cleaning is responsible for over 50% of all deposit disputes, according to the Tenancy Deposit Scheme. The most common areas are ovens (baked-on grease), bathrooms (limescale and mould), carpets (stains and odours), and small items like window tracks and skirting boards that accumulate grime invisibly throughout the tenancy.
How do I remove Blu-Tack marks from walls in student accommodation?
Rub a fresh ball of Blu-Tack directly over the residue — the fresh putty lifts the dried residue effectively. For stubborn marks, use a melamine foam pad (magic eraser) with light circular motions. On matt-painted walls, test in a hidden spot first. A small amount of white spirit on a cloth is a last resort for persistent marks.
How do I remove limescale from taps and showerheads?
Soak a cloth in white vinegar (or Viakal/HG) and wrap it tightly around the tap or showerhead. Leave for 30–60 minutes, then scrub with an old toothbrush. For a showerhead with blocked nozzles, remove the head and soak it fully in vinegar for an hour. Rinse thoroughly. For heavy build-up, repeat the process or use a stronger product.
How do I prevent mould growing in my student room?
Open your window for at least ten minutes every morning — this releases overnight moisture. Use the bathroom extractor fan during and after every shower. Leave a small gap between furniture and external walls. Wipe condensation off windows each morning. If mould returns persistently and you have reported it to your landlord, widespread mould caused by damp or a structural issue is generally the landlord’s responsibility.
What deposit protection schemes exist for students in the UK?
There are three government-approved schemes under the Housing Act 2004: the Tenancy Deposit Scheme (TDS), the Deposit Protection Service (DPS), and MyDeposits. Your landlord must protect your deposit in one of these within 30 days and must give you written confirmation. If they fail to do this, you can claim up to three times the deposit amount in a county court. All three schemes provide a free dispute resolution service.
My landlord is withholding my deposit, but I cleaned the property. What can I do?
First, request an itemised breakdown of every deduction in writing. Compare each deduction against your move-in inventory and move-out photographs. If you have evidence that the condition was the same at check-in as at check-out, or the charge exceeds the actual cost, you have grounds to dispute. Contact the deposit protection scheme holding your deposit and raise a formal dispute. The scheme appoints an independent adjudicator who reviews evidence from both parties. The process is free, and the adjudicator’s decision is binding.

Leave a Reply